Equipment
Recommendations
These suggestions are based on my personal use and
preferences for setting up a budget friendly recording studio. I'm sure there are those out there willing to swear that you need a full-blown budget-busting facility to make a decent recording. My track record says and proves otherwise. The key to working with semi-pro gear or even consumer-grade products is not exceeding the limitations of that piece of equipment.
Is there a difference in a $200,000 mixing console and using a $150 digital audio interface? Yes, but...
when the recording hits the radio or internet, no one will know it. Don't get me wrong, nothing beats recording in a building or room designed specifically for noise reduction and is tuned for proper sound control. So, use what you can afford or already have until you can afford it. The most important asset you have is talent!
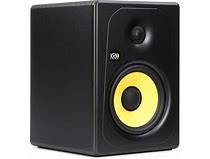


THE KRK KREATE 5
is an excellent monitor for the price. This is a 2-way, 55 watt powered speaker.
PRESONUS ERIS 5 is an 80 watt
2-way powered monitor. This is another excellent choice. A pair would run around $300.
________________________
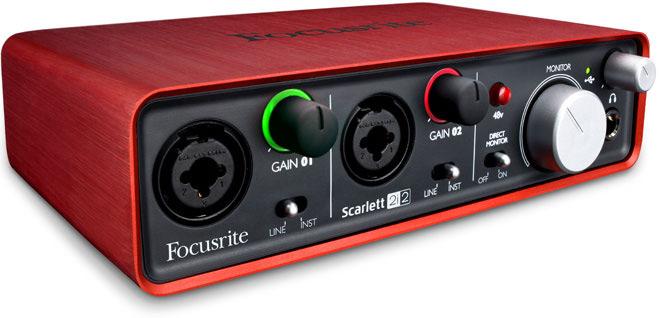
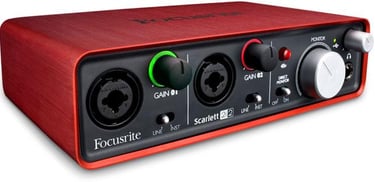

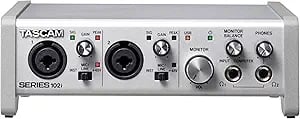
Here are a couple of very nice audio interface options. These can actually serve as your mixers as well. Both come with recording software. The red interface is the Focusrite Scarlett 2i2 and the other unit is the Tascam 102i. Both feature 48 v. phantom power for condenser mics. Both have 2 inputs and gain controls. Both inputs on either unit accept XLR mic connectors and 1/4" instruments cords.
Both are very affordable!
MONITOR SPEAKERS
AUDIO INTERFACES
___________
MICROPHONES
Suggested When You're On A Budget
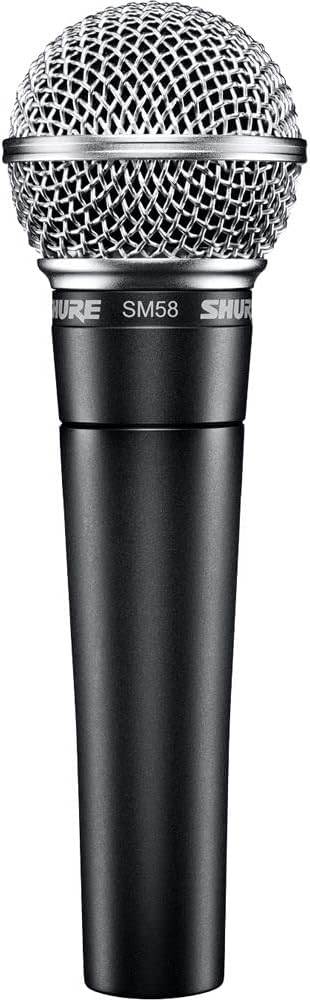

The Shure SM58
(Ball mic)
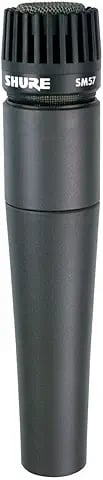
and the Shure SM57
These mics are the workhorses for most sound pros. The SM58 (the ball mic) is primarily a vocal mic that has a nice cardioid pattern which helps reject sounds which are not close to the mic or off axis.
The SM57 (the straight one) is great for instruments, guitar cabinets, horns, drums, etc. If you use this mic for vocals, slip a foam Both of these are affordable.
________________
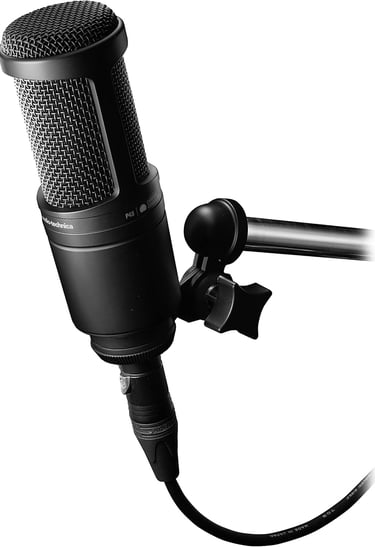
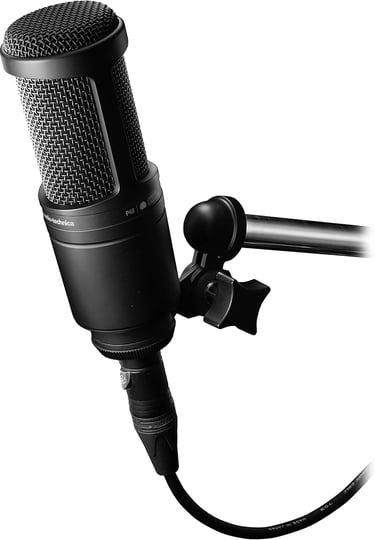
The Audio Technica AT2020
This is a condenser mic which has a pretty decent sound quality and works well on vocals and instruments as well. It's great on acoustic instruments. It needs 48v phantom power to function. (the audio interfaces provide that) They work great in the studio but not so much on live stage PA situations. They have a clean and crisp sound and are very affordable.
_______________

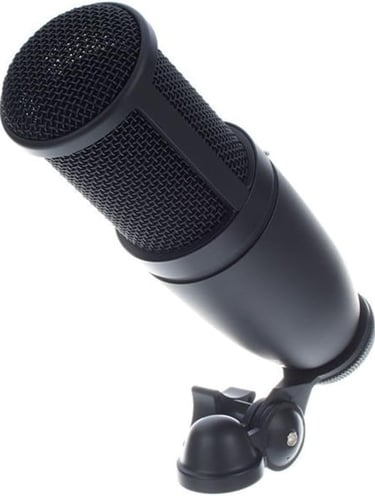
AKG PRO AUDIO P-120
CONDENSER MIC
The AKG line of mics has long been a favorite in many studios. In my opinion, it would be a step up from the AT2020. And another plus for this mic is the price. Great for vocals and most instruments. Horns sound great on this mic.
_____________
COMPUTERS
To do some decent recording using a computer, speed is required. Some audio recording programs might work sufficiently on the computer you already have. My suggestion is to experiment with your present unit. If it bogs down every time you try to add an effect or mixdown a track, you might consider one which has a bit more oomph!
In the early days of computer audio recording, it was hard to get sufficient speed and memory in a computer. Today, however, the companies realize that the music industry is big business and a lot of companies offer their products which are designed for recording off the shelf.
I personally favor working with the Windows computers, but my Pro/tools is on a Mac tower. It didn't early on, though. For years I used a custom-built Windows computer from Dell. I still have that in a closet somewhere.
Here are some basic requirements (minimum) for a computer for recording:
Processor: Should be
Intel Core i5 / i7Ram needed: 16 GB minimum or 32 GB if you're recording with a lot of virtual instruments.
Storage: SSD (solid state drive for the operating system (500 GB+)
Have an external drive to store your projects and samples.Audio Interface: Dedicated external interface with ASIO drivers for low latency. (Focusrite Scarlett / Presonus / Tascam)
Operating System: Windows 10/11 or MacOS 10.14 +
SOME COMPUTER POSSIBILITIESS
As I stated earlier, I record using a Mac Tower but
only after using Windows computers for years.
In the end, it is YOUR responsibility to research your
computer purchase thoroughly. Most recording
programs are not as "hungry" as ProTools. that
being said, I assume no responsibility
for your decision as to which computer
you elect to purchase and use.
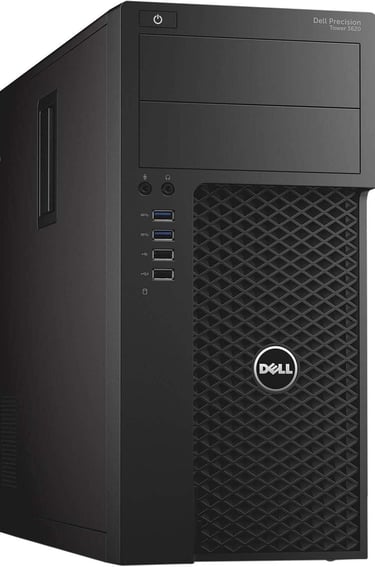
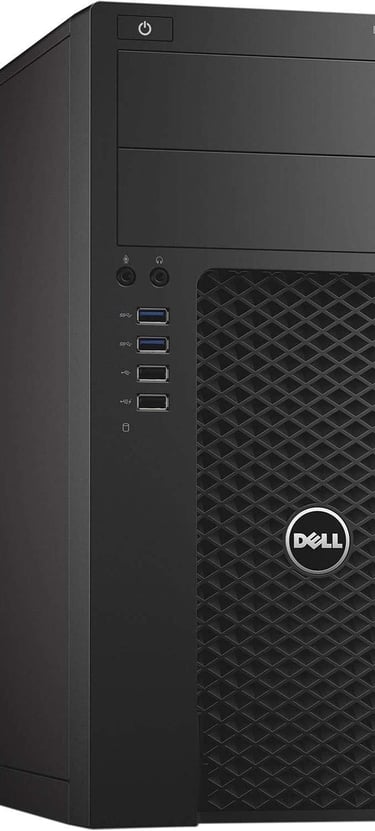
Dell 3620 / T3620
This appears to be a powerhouse of a computer. 32 GB, DDR4 Ram, 512GB SSD+2 TB HDD, WINDOWS 11
This has all the makings of an affordable unit for recording just looking at the specs. It has plenty of storage.
_________

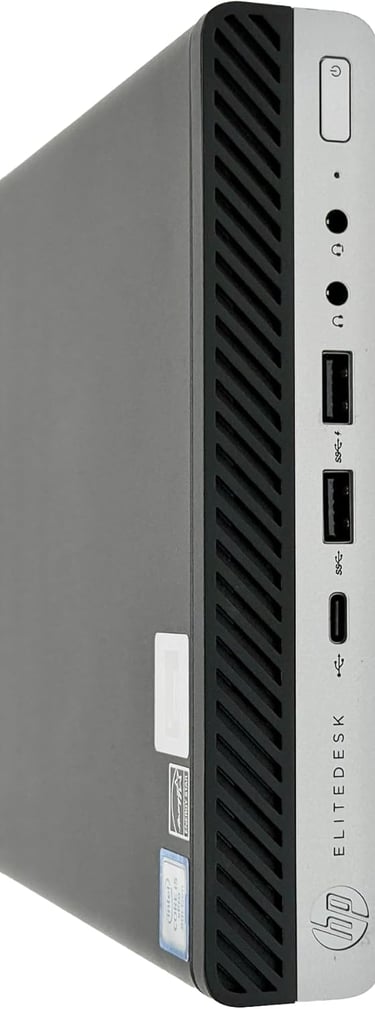
HP ELITEDESK 800 G5
Core i7-9700T, up to 4.8 GHz, 32GB DDR4, 1 TB SSD, Windows 11
______
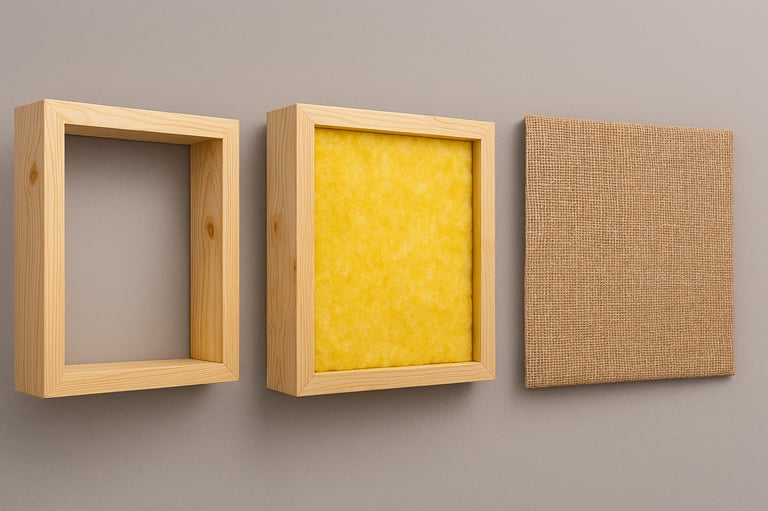
🛠️ DIY Studio Sound Absorber: Step-by-Step Build
Want better sound without breaking the bank? This simple 3-step build gives you a professional-grade acoustic panel using affordable materials and basic carpentry.
Step 1: Build the Frame
Note: Fiberglass comes in either 16" or 24" width. You can make your frames square or rectangle.
Start with four 2" x 4" boards, cut to form a 2-foot by 2-foot square. Assemble them into a sturdy frame with a 4" depth—plenty of room for sound-absorbing material. Use wood glue and screws or a nail gun to secure the corners.
Step 2: Add the Insulation
Cut a piece of fiberglass insulation to fit snugly inside the frame. This is the heart of your sound absorber—it traps mid and high frequencies, reducing reflections and echo in your studio space.
Step 3: Cover with Burlap
Cut a square of breathable burlap fabric slightly larger than the frame. Stretch it tightly across the front and staple it to the back edges of the frame. Burlap lets sound pass through to the insulation while giving your panel a clean, natural look. Another little note: Burlap is available in quite a few colors if you want to jazz up your studio!
💡 Tip: Mount several panels across your studio walls to tame harsh reflections and create a warm, controlled sound environment.

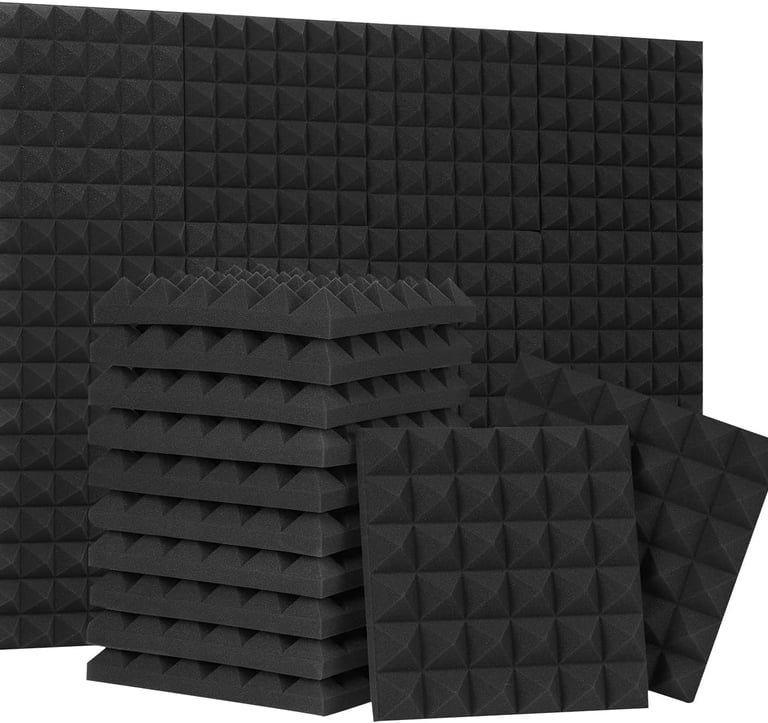
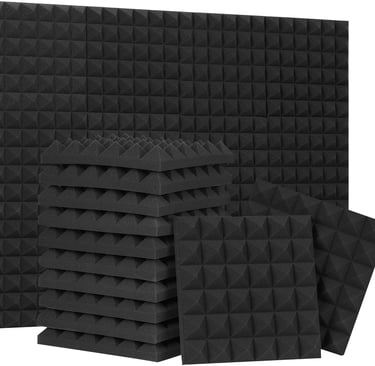
Commercially Available Sound Panels